Fuse beads INSTRUCTIONS

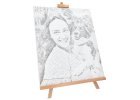
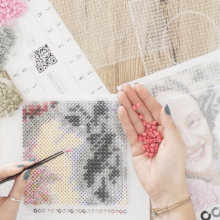
Welcome to the world of Perler beads, where there is plenty of room for fun, leisure, and the discovery of new creative ideas. As per the included pattern template, compose your photograph-inspired picture using the beads, tape them all together and use the iron to fuse them permanently! If you follow our guide (which is divided into sections A, B, and C ), you shouldn't have any problem reaching your goal. However, consider some of the things more as suggestions. It is entirely up to you how you arrive at the ultimate outcome.
Perhaps you'd want to iron the pixel artwork from only one side? Or do you like to construct the image with your fingers rather than the provided tweezers? Let us know what method worked best for you while creating your picture using Perler beads. We'd be thrilled if you show other Perler bead fans how you did it.
What’s in our Perler bead set?
- Colourful beads in sachets - colours and quantity customised to the picture purchased
- Masking tape
- Overall pattern template
- Individual pegboard graphic templates for cutting out
Option "with tools"
How to identify the right sachet?
Suppose you want to begin filling all of the spaces with the symbol "1." Look up the "colour code" in the legend to see what the "1" symbol stands for. According to it, you'll easily find the relevant sachet with beads labelled with the same number.
PART A - PLACEMENT OF BEADS ON PEGBOARDS
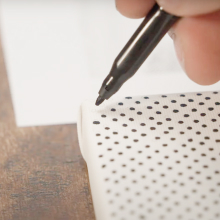
1.Cut out your first pegboard template along the indicated lines, and place it under the transparent pegboard.
2.Place your beads on the pegboard with the tweezers. The goal is to fill the entire pegboard with the appropriate beads according to your template.
3.Done? Tape the beads on the pegboard together. Tape in rows, so that they overlap.
4. Gently press down on each strip of tape on the pegboard to ensure that every bead adheres to it.
5. Keep doing it until you've taped the entire beaded section, but equally proceed carefully as to not spill them.
6.Cut the tape ends perfectly in line with the pegboard's edge. It will be helpful when ironing the beads.
7.Repeat points 1-6 with each subsequent pegboard.

PART B - JOINING ALL THE SQUARES
1. Prepare two finished parts, or squares, that are meant to be next to each other and two pegboards. Those slot into each other with the help of little protuberances on the side.
2.Transfer both squares of beads onto the connected pegboards. Tape them together down the middle.
3.Remove one of the pegboards and move it to its new position. Align and fix it in place, using the protuberances on the pegboard to the one next to it.
4. Position another completed square with beads onto that pegboard, corresponding to its place in the pattern.
5. Tape it using the masking tape to its adjacent piece. Then move the pegboard which you have yet to move, to its new position.
6. Use the protuberances to align it again to the pegboard next to it.
7.Place yet another square of beads onto the newly repositioned pegboard and secure it with masking tape to the adjacent pieces.
8. Finally, remove the pegboards, or continue adding sections according to your template and repeat steps 3 to 7.

PART C - IRONING
1. Lay down some baking paper on a flat surface. Fix the corners with masking tape.
2. Transfer your complete work to the prepared area. The taped side must face down.
3. Place another sheet of baking paper over your beadwork, and again fix the corners with tape.
4. You can start ironing (or ask for help from an adult).
5. With your iron on the highest setting, run it over your beadwork in circular motions. Don't burn yourself!
6. Continue until the edges of all the beads fuse to each other. The ideal result is one where the bead holes are still visible and not completely melted.
7. Undo the taped corners, lift the baking paper and turn your beadwork over.
8. Undo the taped corners, lift the baking paper and turn your beadwork over.


